

At its core, a classic tallow soap recipe is beautifully simple: just rendered tallow, lye (sodium hydroxide), and water. That's it. Through a chemical reaction called saponification, these ingredients transform into a hard, creamy, and wonderfully moisturizing bar of soap.
The process might sound a bit like a chemistry experiment, but it's pure magic. Saponification ensures that no lye is left in the final bar—only gentle, skin-loving soap that’s especially good for those with sensitive skin.
Why Tallow Soap Deserves a Place in Your Skincare
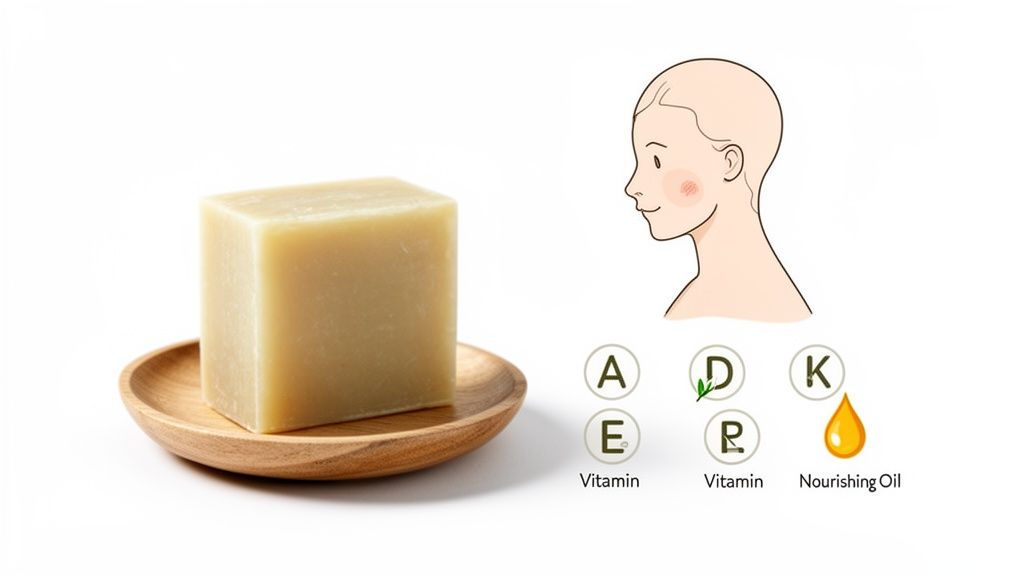
So, why are so many people rediscovering this traditional ingredient? Tallow isn't just another fat you can throw into a soap pot. Its unique properties make it almost perfect for skincare, particularly for anyone dealing with dryness or irritation. The real secret is its biocompatibility.
Think of it this way: the fatty acid profile in tallow is incredibly similar to the natural oils in our own skin. This means our skin recognizes it, drinks it in, and uses it to replenish moisture without that heavy, greasy feeling that can clog pores. It’s a soap that truly works with your skin.
The Nutrient-Rich Advantage
Unlike a lot of plant-based oils, tallow is absolutely loaded with fat-soluble vitamins that are crucial for healthy skin. When you use a tallow soap, you’re delivering these nutrients right where they’re needed.
- Vitamin A: Helps with skin cell turnover and keeps things fresh.
- Vitamin D: Plays a key role in skin protection and rejuvenation.
- Vitamin E: A potent antioxidant that defends your skin against daily stressors.
- Vitamin K: Known for supporting the skin's natural healing abilities.
This isn't just a bar of soap that cleans. It nourishes, protects, and helps fortify your skin's natural barrier. If you want to go deeper on this, we've broken down all the incredible beef tallow soap benefits in another article.
One of the best things about tallow is the incredibly hard, long-lasting bar of soap it creates. Your homemade soap won't turn into a pile of mush in the shower, which means you get fantastic value and durability compared to a lot of other soaps out there.
A Nod to Tradition and Purity
People have been making soap with tallow for centuries. Early soap makers prized it for creating a solid, cleansing bar that lathered well, even in less-than-ideal hard water.
It's a historical powerhouse. By the 18th century, tallow soap was everywhere, making up over 90% of soap production in England around 1790 simply because animal fats were so readily available. You can find more interesting facts about the history of tallow fatty acids on futuremarketinsights.com.
Making your own tallow soap is more than just a DIY project. It’s a way to reconnect with a pure, time-tested ingredient that has cared for skin for generations. You’re stepping away from synthetic detergents and long chemical lists and returning to something truly simple and effective.
Getting Your Ingredients and Tools in Order
Before you even think about mixing anything, let's talk about prep. The secret to a truly amazing bar of tallow soap isn't just in the recipe—it's in the quality of what you put into it. Getting your ingredients and gear lined up first makes the whole process smoother, safer, and a lot more fun.
The Heart of Your Soap: Finding the Right Tallow
The star of the show is, of course, the tallow. While technically any rendered beef fat will turn into soap, if you want a truly nourishing bar, you’ve got to be a little picky. I always recommend using 100% grass-fed and grass-finished tallow. There's a real difference. Tallow from cattle raised on pasture is packed with more skin-loving nutrients like vitamins A, D, E, and K. You can learn more about its journey and benefits in our guide on where tallow comes from.
So, where do you find the good stuff? Your local butcher shop or a farmers' market are great places to start. You can also find fantastic suppliers online who specialize in grass-fed products. If you're starting with raw suet (the hard, flaky fat from around the kidneys), you'll need to render it down first. It’s an extra step, but it’s what gives you that pure, clean base for a beautiful, neutral-smelling soap.
Choosing Your Supporting Ingredients
Tallow might be the headliner, but its supporting cast is just as important. For this recipe, we'll be using extra virgin olive oil. I love this combination because the olive oil’s moisturizing qualities are the perfect partner for the tallow, helping to create a wonderfully balanced and creamy lather. Just make sure you grab a pure, food-grade olive oil without any weird additives.
The magic ingredient that turns it all into soap is 100% sodium hydroxide, better known as lye. This is absolutely essential for making a true, hard bar of soap. You can typically find it at hardware stores or online, but check the label carefully. You want pure sodium hydroxide—no extra chemicals that you might find in drain cleaners. And it goes without saying, handle this stuff with serious respect.
The demand for ingredients like tallow is booming. The global tallow market, which was valued at USD 9.92 billion in 2025, is expected to hit USD 19.14 billion by 2034. This growth is all about people like us looking for natural, effective ingredients for personal care.
Your Soap Making Toolkit
Once your ingredients are sourced, it's time to gather your gear. Having everything laid out and ready to go before you start is a game-changer. You don't need a professional lab, but a few specific items are non-negotiable for safety and for getting the recipe right.
I've put together a checklist of the essential equipment you'll need. These tools are crucial for both safety and the success of your soap-making project.
Essential Equipment Checklist for Tallow Soap Making
| Item Category | Specific Tool | Why It's Important |
|---|---|---|
| Safety First | Safety Goggles | Absolutely non-negotiable. Protects your eyes from lye splashes. |
| Safety First | Chemical-Resistant Gloves | Protects your hands from lye burns. Standard dish gloves are fine. |
| Safety First | Long-Sleeved Shirt & Pants | Creates a physical barrier to protect your skin from accidental contact. |
| Measuring | Digital Kitchen Scale | Precision is everything. Measuring by weight (not volume) is the only way to make safe soap. |
| Mixing | Lye-Safe Containers | Use stainless steel or heavy-duty #2 (HDPE) or #5 (PP) plastic. Never use aluminum. |
| Mixing | Stick (Immersion) Blender | The fastest way to bring your soap to "trace" and ensure it's properly emulsified. |
| Mixing | Silicone Spatulas | Flexible and heat-resistant, they help you get every last drop of soap into your mold. |
| Molding | Soap Mold | A silicone loaf mold is a fantastic, easy-to-use option for beginners. |
Having these items ready will make your soap-making day go off without a hitch.
A Quick Tip from Experience: It's a really good idea to have a dedicated set of tools just for making soap. Even after a good wash, I never mix my soap-making gear with my regular kitchen utensils. This simple habit completely eliminates any risk of cross-contamination and keeps everything safe and organized.
Your Step-by-Step Tallow Soap Recipe
Alright, this is the part we’ve been waiting for—turning our carefully measured ingredients into beautiful bars of handcrafted soap. I'll walk you through every step of the process. My goal here isn't for you to memorize the recipe, but to understand the flow and why each step is important. Think of it less like a rigid formula and more like a dance between fats and lye.
This particular recipe is one of my favorites for beginners. It's simple, pure, and creates a wonderfully gentle, unscented bar that's perfect for anyone with sensitive skin. All the measurements are in grams because, in soap making, precision is everything. Grab your digital scale, and let's get started.
This visual guide gives you a bird's-eye view of the entire process, from gathering your gear to the final pour.
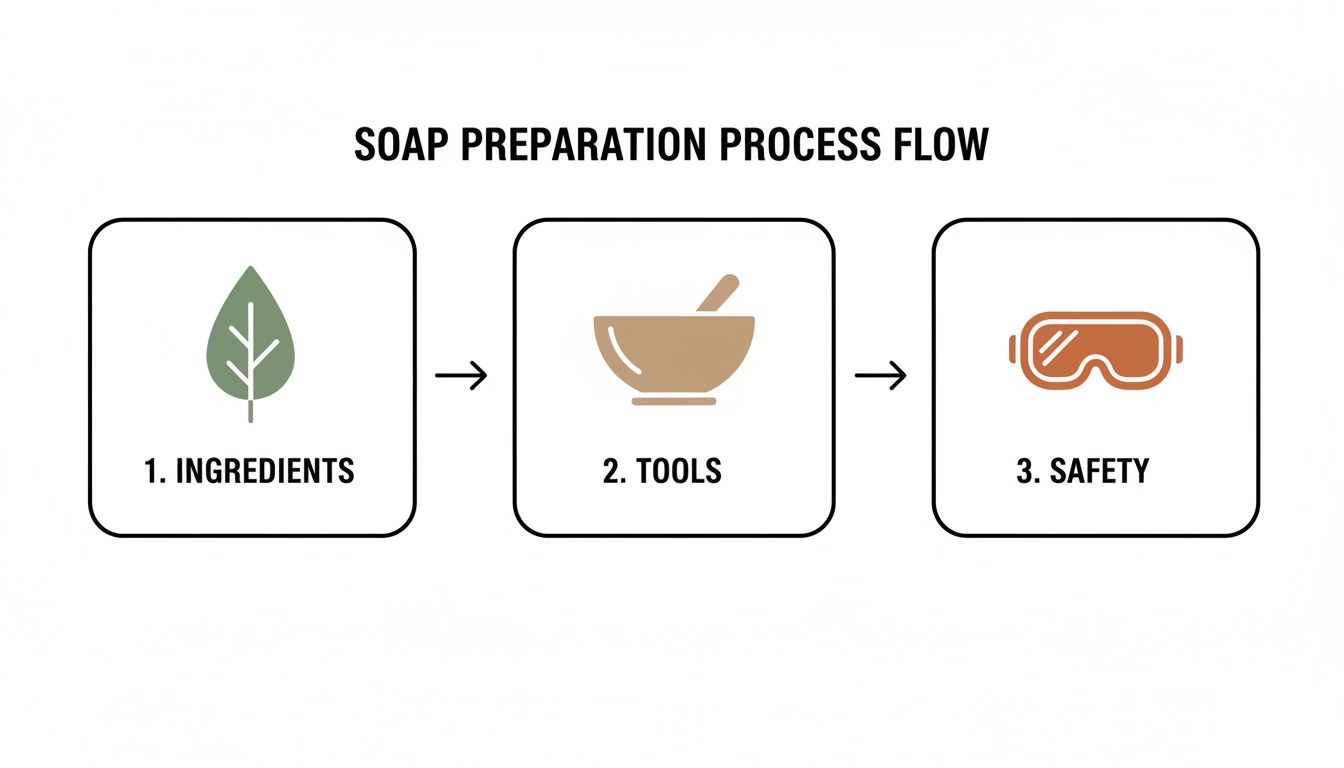
As you can see, a great batch of soap starts well before you ever mix anything. It’s all about having your safety gear, ingredients, and tools ready to go. On that note, learning how to write recipes that people actually follow has really helped me refine my own instructions to be as clear as possible.
Ingredient Measurements for a Gentle Bar
Here are the exact weights for a one-pound batch. This amount fits nicely into a standard silicone loaf mold, giving you a handful of good-sized bars. Remember, using a digital scale isn't optional—it's essential for safety and getting consistent results.
- Beef Tallow: 340 grams (approx. 12 oz)
- Extra Virgin Olive Oil: 113 grams (approx. 4 oz)
- Distilled Water: 172 grams (approx. 6 oz)
- 100% Sodium Hydroxide (Lye): 62 grams (approx. 2.2 oz)
This specific ratio gives us what soap makers call a 5% superfat. In plain English, that means we’re intentionally leaving 5% of the lovely fats and oils unconverted into soap. That little bit of extra fat is what makes the final bar so moisturizing and kind to your skin. If you get bit by the soap-making bug and want to start creating your own formulas, check out our deep dive on creating a https://wildtallow.com/blogs/articles/tallow-soap-base.
Safely Preparing the Lye Solution
This is the step where you need to give your full attention. Lye is a powerful caustic, but it's completely safe when handled with respect. First things first: work in a well-ventilated space. Open a window, turn on the range hood, or even take this step outside. And before you even think about opening the lye container, put on your safety goggles and gloves.
Measure your distilled water into a sturdy, heat-proof pitcher (heavy-duty plastic or stainless steel is perfect). In a separate small bowl, carefully weigh out your lye flakes.
Now, remember the soap maker's mantra: Always add the lye to the water. Never, ever pour water onto lye—it can cause a mini volcano of hot, caustic liquid. Slowly and gently pour the lye flakes into the water, stirring with a silicone spatula until every last crystal is dissolved.
The mixture is going to get hot—really hot. We're talking up to 200°F (93°C). It will also release some pretty potent fumes as the chemical reaction happens. This is totally normal, but you don't want to be breathing it in. Once it's dissolved, carefully set the lye solution aside in a safe spot where no kids or pets can get near it, and let it cool down.
Melting and Combining the Fats
While the lye solution is cooling, let's get the fats ready.
In a stainless steel pot, combine your pre-weighed beef tallow and extra virgin olive oil. Warm them gently on the stove over low heat. The goal is just to melt everything together into a clear, unified liquid—we're not trying to cook it. As soon as it’s all melted, take it off the heat.
The magic happens when both your lye solution and your melted fats are at a similar temperature, ideally somewhere between 90°F and 110°F (32°C to 43°C). An infrared thermometer is your best friend here. Getting the temperatures right ensures the lye and fats combine smoothly for a perfect emulsion. It’s a lot like baking; temperature really matters.
Achieving the Perfect Trace
It's time to make soap! Once your lye water and fats have both cooled down into that target temperature range, you can combine them. Very carefully and slowly, pour the lye solution into the pot containing the melted fats.
Grab your stick (immersion) blender. To avoid splashing and incorporating too much air, tilt the blender slightly as you submerge it in the mixture. Start by giving it a few short pulses, then stop the motor and use the blender head to stir. Alternate between pulsing for a few seconds and stirring.
You're watching for a magical moment called "trace." This is when the soap batter thickens up to the consistency of thin pudding. The classic test is to lift the blender out and let the batter drizzle back onto the surface. If it leaves a faint trail—a "trace"—for a moment before sinking back in, you’re there.
Depending on your temperatures, this can take anywhere from 1 to 5 minutes. Don't rush it. For this simple recipe, a "light trace" is exactly what you're aiming for.
Molding Your Soap
Once you've hit that light trace, it's time to get the soap into its mold.
Carefully pour the soap batter into your silicone loaf mold. Use a good spatula to scrape the pot clean—you don’t want to waste a single drop of your liquid gold!
Give the mold a few firm taps on the counter to work out any air bubbles that might be hiding in there. Now, cover it lightly with a piece of cardboard or a clean kitchen towel. This helps insulate the soap and encourages it to go through the "gel phase," a natural heating process that gives the final bar a slightly more translucent, professional look.
Find a safe place for your mold where it won't be disturbed, and let it sit for 24 to 48 hours. During this time, it will harden into a solid loaf. After a day or two, it will be firm enough to pop out of the mold and slice into bars (wear gloves for this part!). The soap isn't ready to use just yet, though. The next step is curing, and it's what turns your creation from just "soap" into a hard, long-lasting, and incredibly gentle bar.
The Art of Curing: Turning Good Soap into Great Soap
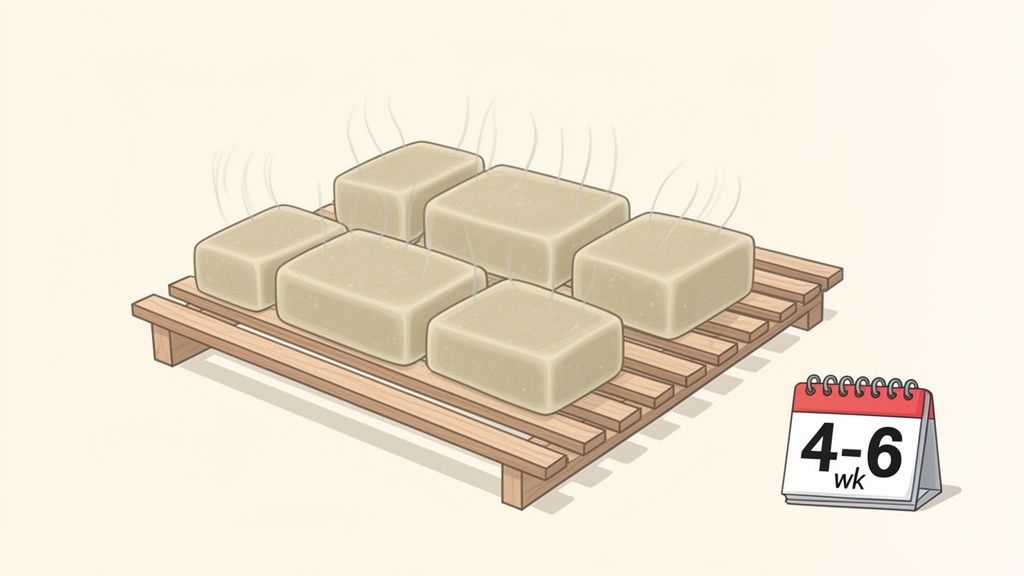
After all that careful measuring and mixing, it's tempting to think you're finished. But perhaps the most critical part of this tallow soap recipe is just getting started. This final, quiet step is curing, and it’s what turns a fresh, soft block of soap into the hard, gentle, and long-lasting bar you’re aiming for.
Patience really is everything here. While your soap is technically safe to handle with gloves a day or two after you cut it, it's nowhere near ready for your skin. The real magic happens over the next 4 to 6 weeks. Trust me, skipping this wait is a mistake you don't want to make.
Why You Can't Rush the Cure
Curing is really a two-part process. For one, the saponification that kicked off when you mixed the lye and fats is still finishing up. While the bulk of the reaction happens in the first 48 hours, it takes weeks for every last bit of lye to be converted. This slow finish is what makes the final bar incredibly mild and brings it to a skin-friendly pH.
At the same time, all the water you used to dissolve the lye is slowly evaporating. This is what hardens the soap. A well-cured bar is a dense, solid bar—and that means it won't turn into a mushy mess in your shower after a couple of uses.
Think of it like aging a fine cheese or wine. The basic ingredients are there, but time is what develops the final character and quality. Curing gives your homemade tallow soap its premium feel, creamy lather, and impressive longevity.
Setting Up the Perfect Curing Spot
The secret to a great cure is good airflow. Your soap needs to breathe! After slicing your loaf, arrange the bars on a drying rack, leaving at least an inch of space between each one. This allows air to circulate freely on all sides, which is key for even drying.
Where you put that rack matters, too. Find a spot that's cool, dry, and out of direct sunlight.
- A linen closet with slatted shelves is perfect.
- A spare bedroom or a dry corner of the laundry room works well.
- Just avoid humid places like an active bathroom or a damp basement. The moisture in the air will slow the whole process down to a crawl.
I always make a point to flip the bars over about halfway through, usually around the three-week mark. It’s a small step, but it helps ensure all sides cure evenly.
How to Know When Your Soap Is Finally Ready
The most foolproof method is simply to wait the full 4 to 6 weeks. When you set your soap out to cure, mark your calendar. It's the best way to resist temptation. As the weeks pass, you'll notice the bars getting harder and visibly lighter as the water content drops.
If you want a more hands-on test, you can gently press a thumbnail into the corner of a bar. If it leaves a noticeable dent, it’s still too soft and needs more time. A fully cured bar will feel firm and solid, resisting the pressure.
This waiting game is the final touch. It’s what separates a decent bar of soap from an exceptional one. Your patience will be rewarded with beautiful, handcrafted soaps that are wonderfully gentle and built to last.
Troubleshooting Common Soap Making Mistakes
Sooner or later, every soap maker has a batch go sideways. It's just part of the craft. Even with the perfect tallow soap recipe, things happen. But instead of seeing it as a failure, think of it as your soap "talking" to you.
These little hiccups are how you really learn the ropes and become a confident soaper. Learning to read the signs—is it the temperature? Did I over-blend? Is that fragrance oil misbehaving?—is a skill that will serve you for years. Let's walk through some of the most common issues.
When Your Soap Batter Gets Too Thick Too Fast
One minute you have a beautiful, fluid batter, and the next, it’s the consistency of mashed potatoes. Soap makers call this "seizing," and it can happen in the blink of an eye, leaving you no time to get it into the mold gracefully.
What causes this? Usually, it’s a heat issue. If your lye solution and your fats are too warm when you combine them, the saponification process goes into overdrive. Another common culprit is getting a little too happy with the stick blender. It's easy to push the batter right past trace and into a solid brick.
If your soap seizes, the key is to move fast. Don't try to blend it anymore. Just grab a spatula and plop that thick batter into your mold any way you can. Bang the mold firmly on the counter to work out some of the air pockets. The bars might end up looking a bit rustic, but they will almost always be perfectly good, usable soap once they've cured.
The Problem of a False Trace
On the other end of the spectrum, you might get a "false trace." This is when your batter looks like it has thickened up, but it’s a bit of a trick.
It happens when hard fats like tallow start to cool and solidify before the lye has had a chance to properly emulsify everything. The batter gets thick, but it’s not from saponification. If you pour a false trace, you’ll often find your soap separates in the mold, leaving a layer of oil on top.
To avoid this, keep a close eye on your temperatures, aiming to combine your fats and lye when both are in the 90°F to 110°F range. If you think you have a false trace, hit the batter with your stick blender for just a few more short bursts. A true trace will hold; a false trace might thin out before thickening again.
Pro Tip: A true trace holds its shape. When you drizzle a bit of batter off your blender, the lines should sit on the surface for a moment. If it just looks thick but doesn't leave a distinct trail, you might be dealing with a false trace.
Dealing with Dreaded Soda Ash
Ever unmolded a gorgeous batch of soap only to find a dull, white, chalky film covering the surface? That’s soda ash. It’s harmless, but it can definitely spoil the look of your beautiful bars.
Soda ash (or sodium carbonate) forms when unsaponified lye in the fresh soap reacts with carbon dioxide in the air. It’s more likely to appear in recipes with more water or when the soap cools down too quickly after pouring.
Here are a few tricks to keep it at bay:
- Insulate Your Mold: Tucking your mold in with a towel for the first 24 hours keeps the soap warm, encouraging a full gel phase that helps prevent ash.
- Try a Water Discount: Slightly reducing the water in your recipe is a fantastic way to combat soda ash. This is a bit more of an advanced move, so maybe save it until you've got a few successful batches under your belt.
- Spritz with Alcohol: A light mist of 99% isopropyl alcohol right after you pour creates a barrier between the soap surface and the air.
And if you do get soda ash? Don't sweat it. You can often just wash it off with water or steam it away by holding a hot iron a few inches above the bars. Underneath that chalky layer, your soap is still perfect.
Common Soap Making Problems and How to Fix Them
Even the most seasoned soapers run into trouble now and then. This table is a quick-glance guide to help you identify what went wrong and, more importantly, how to fix it—or at least what to do differently next time.
| Problem | What It Looks Like | Common Cause | How to Fix It |
|---|---|---|---|
| Seizing | Batter thickens into a solid mass instantly. | Ingredients too hot; over-blending; a misbehaving fragrance oil. | Work quickly! Plop the thick batter into the mold and tap to remove air pockets. The soap is usually fine, just not as pretty. |
| Separation | Pockets or layers of oil in the finished bar. | Poured at a false trace; not blended enough to reach a stable emulsion. | Rebatching is your best bet. Grate the soap, melt it down gently in a crockpot with a splash of milk or water, and re-mold it. |
| Soda Ash | A white, chalky film on the surface of the soap. | Soap cooled too quickly; too much water in the recipe. | Insulate your mold after pouring. You can often wash or steam the ash off the cured bars. |
| Cracks or "Glycerin Rivers" | Cracks on top or translucent, river-like veins. | Overheating. The soap got too hot during the gel phase. | Put the soap in a cooler spot next time, or even pop it in the fridge for the first 24 hours if your house is warm. The soap is still perfectly safe to use. |
Don't let these potential issues scare you off. Every batch, whether it's perfect or "rustic," is a learning experience that makes you a better soap maker.
A Few Common Questions About Making Tallow Soap
Getting into soap making, especially with a traditional ingredient like tallow, naturally brings up a few questions. Even if you've followed a recipe to the letter, it's normal to wonder about the little details, particularly when you're handling something like lye for the first time.
I've put together answers to the most common queries I hear. Think of this as your personal troubleshooting guide—it's here to build your confidence and make sure your first batch of tallow soap is a huge success.
Is It Really Safe to Use Lye at Home?
Yes, making soap with lye at home is completely safe—if you follow the proper safety rules. It's all about respect. Sodium hydroxide (lye) is a powerful, caustic substance on its own, but it gets completely used up during saponification. That's the magical chemical reaction that transforms fats and oils into soap.
When all is said and done, there is absolutely no active lye left in a fully cured bar of soap.
To work with it safely, you just need a few non-negotiable habits:
- Always wear your safety goggles and gloves. Splashes can and do happen, and this is your best line of defense.
- Work in a well-ventilated area. Open a window or turn on a fan to dissipate the fumes that happen when lye meets water.
- Remember the golden rule: Always add the lye to the water. Never, ever pour water into lye, or you’ll get a dangerous, volcano-like reaction.
Stick to these basics, and you can make incredible soap at home without any worries.
Can I Swap Out the Olive Oil for Something Else?
You definitely can, but this is a big one: you must recalculate your lye. Every single oil has a unique saponification (SAP) value, which is just a fancy way of saying it needs a specific amount of lye to turn into soap.
I chose olive oil for this recipe because it helps create a wonderfully gentle and moisturizing bar. If you decide to use another oil, like avocado or sunflower, the chemistry of the recipe changes.
You have to run your new recipe through a reliable online lye calculator. If you skip this step, you risk creating a soap that's either harsh and lye-heavy (unsafe for skin) or a soft, oily mess that never hardens properly. For your first few batches, I really recommend sticking to the original recipe. It's a proven formula.
Why Does My Tallow Soap Have a Strong, Beefy Smell?
The scent of your finished soap comes down to one thing: the quality of your tallow. High-quality, cleanly rendered tallow from grass-fed sources should result in a soap with a very neutral, almost clean smell. Any initial "tallow" scent almost always vanishes during the cure.
If you're noticing a strong, unpleasant, or overly "beefy" odor, it usually points to one of two things. Either the tallow wasn't rendered "cleanly," meaning some impurities were left behind, or it came from older, lower-quality fat.
For a beautiful, neutral-smelling soap, start with the freshest suet you can find or buy your tallow from a reputable source that specializes in it. You can also re-render your tallow a second or even third time to purify it further, which dramatically reduces any lingering smell.
How Do I Know When My Soap Is Finally Ready to Use?
Patience is key here. The standard curing time for any cold-process soap, including this one, is 4 to 6 weeks. While the soap is technically safe to touch (with gloves on) after a day or two, curing is a crucial step you just can't skip.
During these weeks, two important things happen. First, excess water evaporates, creating a much harder, more durable bar that will last ages in your shower. Second, the pH level continues to drop, making the soap incredibly mild and gentle.
A simple way to check is to press your thumbnail into the corner of a bar. If it leaves a noticeable dent, it needs more time on the curing rack. For a more scientific approach, you could use pH testing strips—you're looking for a final pH between 9 and 10. Honestly, though, just waiting the full 4-6 weeks is the most foolproof method.
If you're making soap to share, you might also want to look into how to safely ship beauty products to make sure your beautiful bars arrive intact.
At Wild Tallow Skincare, we believe in the power of simple, pure ingredients. Our handcrafted soaps are made with 100% grass-fed tallow to nourish your skin naturally. Discover the difference at https://wildtallow.com.